Hello again ! What I want to share how to take a regular slab in Revit Architecture and taper any or all of its edges. In order to do this we need we will use "The Floor Slab Edge" tool found under "Host Sweep" in the Modeling tool drawer and click on the edges on the floor slab we want to alter. However before we begin we need to configure the "Edge" and this is the tricky part.
First let's build a profile which will give us the shape of the taper. Lets go to and on the dialog box, let's select the appropriate templeter which is Porfile.rtf and click open.
What we have now in front is a drawing area in which we are going to draw our 2D profile. Since this profile will be swept around the edges of the floor slab, we need to draw a section of the taper we want to occur.
Use the Line tool to draw the shape and you can use refereance planes if you wanted to make the profile parametric. By the way come to one of our cusomized training to learn how to build parametric components.
Now just save the profile and load it into your current project or into the project were the floor slab you wish you modify exist or will be created. Now we can go into and redefine the existing slab edge to use the profile we just created.
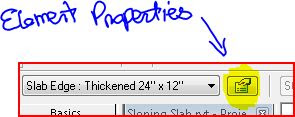
Once the element properties dialog appear, we need to either rename the current Slab Edge definiton or create a new one by using the Element properties dialog and into Type porperties.
At this point as you can see in the above screen shot, all you need to do is load the profile we made, click OK to exit all the dialogs and beging to click on the edges of your Floor object.
e-mail me or call me here at the office if you have any questions.


